Last Update
Table of Contents
Winter is the perfect season to finally tackle that cluttered attic of yours.
With more time on your hands due to the California winter rain, now is the time to take advantage of the opportunity and dedicate some of it to cleaning and organizing your attic.
The attic is often one such space that gets neglected – a once-organized storage area that has become cluttered with things no longer used. But what if you took this period of prolonged rain as an opportunity to declutter your attic?
Not only will it make for easier access when searching for items, but it will also help improve your home’s overall energy efficiency.
The best way to get started is by having a plan in place, which will help keep you efficient and organized throughout the process. Professional cleaning and organizing experts suggest following certain tips to ensure you can declutter your attic in the most effective way possible.
Creating an organized storage space requires thoughtful planning, so be sure to use some of these helpful tips while you’re at it.
1. Make a plan

Having a plan allows you to sort items more efficiently and it helps direct your decisions on what to keep, donate, or throw away.
Without a plan, it’s easy to get overwhelmed by the number of items that may reside in the space.
It can also be hard to decide where exactly to start cleaning and organizing if you don’t know what you want the result to look like.
Taking some time beforehand to consider your goals for the space and brainstorm ways of achieving them can make all the difference in how quickly and effectively you organize your attic.
2. Look Around Your Attic

Now that you’re committed to saying goodbye to your attic’s clutter so it can shine again, take a good look around and ensure the work environment is secure beforehand.
Make sure that the space is safe to work in; check for any loose wires or beams, wear protective clothing and a hard hat, and if you have a steep ladder leading up to the attic then use a stable platform so you can safely reach it.
Make sure you have enough help when removing items from the attic: heavy furniture can be difficult to handle alone and fragile items should be handled with care.
Before starting to move items from the attic, you should clear a path from the attic entrance to an area downstairs where you can store everything.
To keep your possessions safe while transferring them, wrap fragile items in bubble wrap or other protective materials before taking them downstairs.
3. Empty and Clean the Space

Taking out everything from the attic allows you to assess what you have.
By clearing everything out at once, you’ll be able to get an overall picture of what needs to be done and create a plan for how best to organize and store your items going forward.
The next step when preparing your attic for storage is to empty and clean the space.
Start by removing all items from the attic, such as furniture, boxes, containers, and other miscellaneous items.
Before you start cleaning, it’s important to check for any potential hazards that are often found in attics – such as old insulation or exposed wiring.
Once you have ensured that the space is safe to work in, begin vacuuming up any dust and cobwebs that may be present.
Then use a microfiber cloth along with an all-purpose cleaner to wipe down surfaces like the walls and flooring.
If you are dealing with mold or mildew, reach for a specialized cleaner designed specifically for killing mold spores.
Afterward, open the windows and doors, if possible, to allow fresh air into the space while it dries.
Finally, re-inspect the area to make sure that it has been properly cleaned of any dirt or debris before bringing in new items.
4. Categorize Everything

Once everything is outside of the attic and ready to be sorted through, make sure that you have enough space to lay it all out so that nothing gets mixed up.
Cover any nearby surfaces with a sheet or plastic tarp to protect them from inevitable dust or dirt.
Begin sorting items into categories: keep, donate/sell, throw away/recycle – writing clear labels when applicable so that you don’t forget what box contains what later on.
If possible, try separating fragile items like glassware into their containers so they don’t get broken when being moved around.
5. Refresh Your Organized Space With a Purposeful Purging Spree

After everything has been organized, the time has come for a purging spree
The next move when cleaning your attic is to decide what to throw away.
As a general rule of thumb, you should get rid of anything that hasn’t been used in a long time, is broken or damaged, has no sentimental value attached to it, or doesn’t have any practical use for you anymore.
Start by making piles of items you want to keep and items you want to throw away.
This will help you make decisions faster and clearer. You can also make a pile of items that can be donated or sold if they are in good condition and still usable.
When going through boxes, drawers, and cupboards look out for any outdated electronic equipment like old computers or laptops which will need proper disposal due to potential hazards they may contain.
Additionally, check the expiration dates on canned goods and other food products before disposing of them as well.
Throw away any expired food without hesitation as eating past its expiration date can cause serious health issues.
Lastly, pay special attention to hazardous materials such as paint cans or chemical containers as these need special handling during the disposal process.
6. Save Sentimental Items to Look at Them Afterward

Cleaning out the attic can be a daunting task, especially if you’ve been storing items there for many years.
One tip when cleaning your attic is to put sentimental items aside to look at later.
To make the most of your cleaning time, it’s best to set those special items aside for a later reflection when you aren’t on the clock.
With this approach, you can keep yourself focused and productive during tidying-up sessions
As an extra precaution when dealing with nostalgic objects, it’s important to make sure all sentimental pieces are labeled and stored safely in a new container so they can easily be identified in the future.
7. Organize Certain Areas For Specific Items in Your Attic

When it comes to cleaning out your attic, the key is to take your time and not be overwhelmed by the number of items you have. Start by making a list of all of the things you want to keep and then categorize them into groups.
For example, if you have a lot of books, you can designate one area as your library corner where all these books can go.
If there are decorations or holiday items that you only use once a year, make sure to label an area specifically for those items so they don’t get misplaced.
Additionally, make sure to leave some room to store any additional items that may come up throughout the year.
8. Utilize Sealed Storage Boxes

When it comes to protecting your items in the attic from moisture and temperature damage, using sealed bins is an essential key for cleaning your attic.
Sealed storage boxes provide an extra level of security by keeping out dust and debris, as well as preventing any water from entering in.
Sealing up items also helps to protect them from infestations of pests or insects.
Not only will sealed containers provide a more secure storage option, but they also help reduce the amount of clutter in the attic while keeping your items better organized.
It’s important to choose airtight, water-resistant containers with lids that seal tightly so that you can have peace of mind knowing your valuables are staying dry and safe at all times.
Arrange items from most used to least.
For any attic cleaning project, consider organizing items from most used to least.
Placing your go-to objects closest to the entrance will make efficiency and convenience a top priority.
This will make it easier to access and use your items without having to constantly search through piles of boxes and items.
9. Create a List of Inventory

Transform your attic from cluttered chaos to organized bliss with a handy inventory list! Detail all the items stored away, and don’t forget their locations for maximum retrieval ease.
Cleaning out your attic can be a big job; however, by following these steps, you can ensure that your project is completed quickly and efficiently. With a well-organized attic comes improved energy efficiency — something especially welcome during wet winter months — not to mention its ability to store items without taking up valuable living space elsewhere in your home.
Lastly, make sure to properly discard any garbage or outdated items that no longer serve any purpose in your home so that your attic doesn’t become cluttered again.
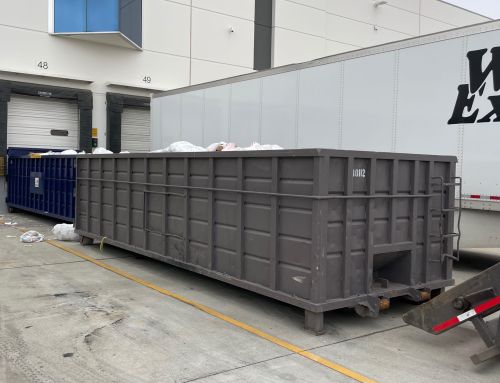
Making sure you have enough bags to dispose of items, organizing the items into categories, and having sufficient moving supplies like boxes or bins will help you tremendously in clearing out your attic quickly. If needed, consider renting a dumpster to make the process easier.
Renting a Dumpster to Clean Your Attic
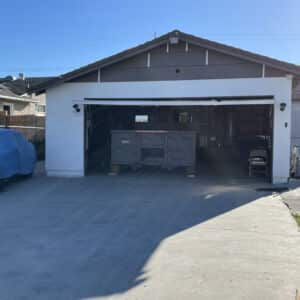
Dumpster rental for small residential projects. Bins4Less
At Bins4Less in Southern California we offer a variety of dumpster sizes for any size of the attic and our excellent customer service team is available to ensure that you get exactly what you need.
So don’t hesitate to reach out if you are looking for an efficient, reliable, and cost-effective dumpster solution for your attic cleanout. Contact us today and let us help you with all your dumpster rental needs.